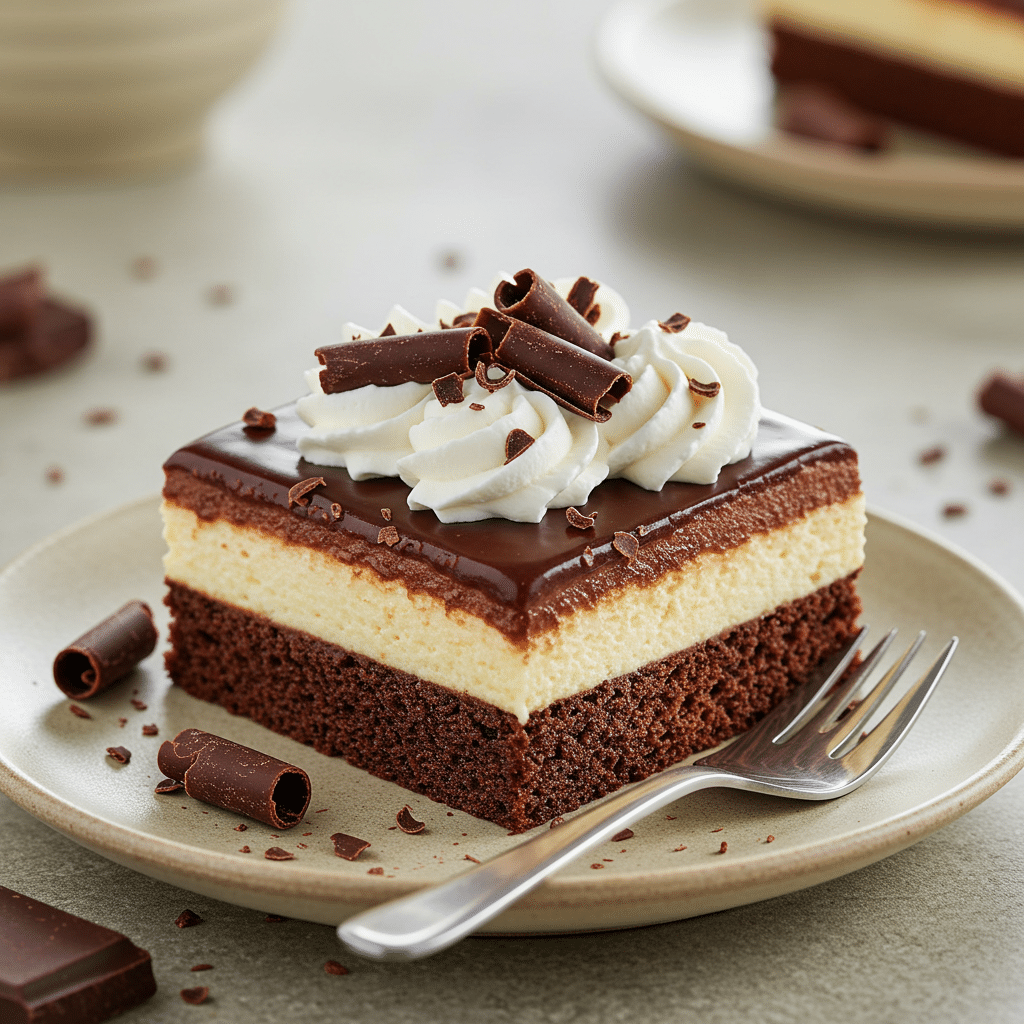
The Brownie Refrigerator Cake is the ultimate chilled treat, blending fudgy brownies with silky cream cheese, luscious pudding, and fluffy whipped topping. Unlike baked layer cakes, this recipe relies on layers that set in the refrigerator, making it ideal for summer parties or anytime you want a cool, indulgent dessert. Each bite offers contrast: dense brownie base, tangy cream cheese layer, smooth pudding, and airy topping. It’s versatile enough to adapt with flavors like peanut butter, strawberry, or mocha, yet classic enough to please any crowd.
In this article, we’ll walk step by step through crafting the Brownie Refrigerator Cake. You’ll learn how to prepare each layer, explore variations, and discover serving ideas. By the end, you’ll have a dessert that’s impressive, customizable, and guaranteed to disappear quickly.
🧾 Want to keep this recipe for later? Download your printable PDF version now and enjoy it anytime!
📥 Download Recipe PDF✅ Print-friendly • 🕒 Save for later • 📱 Mobile-accessible
💡 Want more like this? Subscribe to our weekly printable recipes!
The Appeal of Brownie Refrigerator Cake
Why Refrigerator Cakes Stand Out
Refrigerator cakes are beloved because they combine simplicity with decadence. There’s no need for advanced decorating skills—layers create beauty on their own. The chilling process enhances texture, blending flavors into a harmonious whole. Unlike frosted cakes, the focus here is on creamy, chilled indulgence. It’s a no-fuss dessert that still delivers wow factor.
The Role of the Brownie Base
A sturdy yet fudgy brownie layer grounds the dessert. It adds structure while providing deep chocolate flavor that complements lighter toppings. By enriching the brownie mix with an extra egg, the base becomes richer and holds up against soft cream and pudding layers. Without it, the cake would lack contrast. This combination of firm and creamy is what makes refrigerator cakes irresistible.
Print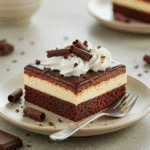
Brownie Refrigerator Cake
- Total Time: 2 hours 30 minutes
- Yield: 12 servings 1x
- Diet: Vegetarian
Description
Brownie Refrigerator Cake combines fudgy brownies with creamy layers of cream cheese, pudding, and whipped topping. A chilled, indulgent dessert perfect for gatherings.
Ingredients
1 brownie mix (9x13 pan size)
1 extra-large egg
1 package cream cheese (8 oz), softened
1 cup powdered sugar
2 containers whipped topping (8 oz each)
1 package chocolate instant pudding (3 oz)
1 package vanilla instant pudding (3 oz)
3 1/2 cups milk
1 Hershey bar or chocolate syrup
Instructions
1. Prepare brownie batter according to package, adding extra egg. Bake in greased 9×13 pan, then cool completely.
2. Beat softened cream cheese until smooth. Add powdered sugar, then fold in 1 container whipped topping. Spread over cooled brownies.
3. Whisk chocolate pudding, vanilla pudding, and milk until thick. Spread over cream cheese layer.
4. Spread remaining whipped topping evenly over pudding layer.
5. Garnish with grated Hershey bar or chocolate syrup.
6. Cover and refrigerate for 2+ hours until set. Slice and serve chilled.
Notes
Chill overnight for best texture and flavor.
Stabilize fresh whipped cream if using instead of topping.
Try variations: Oreo, peanut butter, mocha, or strawberry.
Pair with vanilla ice cream, berries, or espresso whipped cream.
- Prep Time: 30 minutes
- Cook Time: 30 minutes
- Category: Dessert
- Method: No-Bake, Refrigerated
- Cuisine: American
Nutrition
- Serving Size: 1 slice
- Calories: 380
- Sugar: 32g
- Sodium: 260mg
- Fat: 22g
- Saturated Fat: 12g
- Unsaturated Fat: 9g
- Trans Fat: 0g
- Carbohydrates: 42g
- Fiber: 2g
- Protein: 5g
- Cholesterol: 70mg
Key Ingredients and Their Purpose
Building the Layers
The ingredient list may seem long, but each component serves a purpose. Cream cheese provides tang to balance sweetness. Powdered sugar sweetens without grittiness. Whipped topping creates airiness, while pudding adds silky structure. Milk binds everything smoothly, ensuring the cake sets properly in the fridge. Even garnishes like Hershey’s shavings enhance presentation while adding subtle crunch.
Substitutions and Variations
This cake is highly adaptable. Homemade brownies can replace boxed mix for purists. Fresh whipped cream works instead of topping, though it may need stabilization with gelatin. Pudding flavors can change the profile completely—vanilla for simplicity, mocha for sophistication, or strawberry for fruity freshness. Even nuts or caramel can be incorporated for a richer finish, much like the flavor layering found in the Butter Pecan Cake recipe.
Step One: Preparing the Brownie Layer
Mixing and Baking
Follow package directions for the brownie mix, but add an extra-large egg for more richness. Spread batter evenly in a 9×13 pan, greased and floured for easy release. Bake as directed, usually around 25–30 minutes. The brownies should be firm but still moist, as they’ll be chilled later. Let them cool completely before adding any toppings, or layers may melt and collapse.
Why Cooling is Essential
Warm brownies can cause cream cheese or whipped topping to separate. Cooling ensures clean layering and stability. To speed cooling, place the pan on a wire rack or even in the fridge once it’s at room temperature. This patience pays off with neat layers that hold their shape during slicing.
Step Two: Creating the Cream Cheese Layer
Mixing for Smoothness
Beat softened cream cheese until smooth, then add powdered sugar gradually to avoid lumps. Fold in whipped topping gently to keep the mixture airy. Spread evenly over cooled brownies with an offset spatula. This layer is creamy and slightly tangy, balancing chocolate’s intensity.
Tips for Even Spreading
To prevent tearing the brownie base, dollop cream cheese mixture in sections before spreading. Use light pressure and small strokes. If mixture sticks to your spatula, dip it in warm water for smoother spreading. This careful handling ensures a uniform layer that supports pudding above it.
Step Three: Preparing the Pudding Layer
Combining Flavors
Mix chocolate and vanilla pudding powders with milk until thickened. Using both flavors creates depth, with chocolate enhancing richness and vanilla softening intensity. Whisk continuously to prevent lumps. Once thickened, spread carefully over the cream cheese layer.
Importance of Thickness
The pudding layer must be thick enough to set but not too stiff. Undermixed pudding can be runny, while overbeating may cause separation. Aim for a silky consistency that spreads without pouring. This step is critical because pudding provides structural balance between cream cheese and whipped topping.
Step Four: Topping and Garnishing
Adding the Final Layer
Spread the second container of whipped topping evenly across pudding. Smooth with a spatula for a clean finish. This top layer seals everything in, making the cake visually appealing and creamy with every bite.
Creative Garnishes
Chocolate shavings from a Hershey bar add texture and elegance. Alternatively, drizzle with chocolate or caramel syrup for shine. Seasonal fruit, nuts, or edible flowers can also elevate presentation. Garnishes don’t just decorate; they hint at flavors inside, enticing guests before the first bite.
Customizing Brownie Refrigerator Cake
Popular Variations
Experimenting keeps this dessert exciting. Add peanut butter for richness, Oreos for crunch, or espresso for mocha flair. Strawberry pudding and fresh fruit make it lighter, while caramel and nuts create indulgence. Each variation changes the cake’s personality while keeping its core structure intact.
Creative Pairings
Pair this cake with complementary sides for a full dessert spread. Vanilla bean ice cream highlights chocolate’s depth. Fresh berries cut sweetness with tartness. Espresso whipped cream intensifies chocolate flavor. Even roasted nuts or warm raspberry sauce add crunch and brightness. These pairings turn the cake into a star of any table.
Storage and Serving Tips
Refrigeration and Freshness
Refrigerator cakes must be chilled for at least two hours before serving. Overnight chilling improves texture as layers meld together. Keep covered with plastic wrap to prevent drying or absorbing fridge odors. Serve chilled slices with a sharp knife, wiping clean between cuts.
Freezing and Make-Ahead Options
Though best fresh, this cake can be frozen in portions. Wrap tightly in foil and freeze for up to two months. Thaw in the fridge before serving. For gatherings, prepare brownies and fillings ahead, then assemble the night before. This flexibility makes Brownie Refrigerator Cake convenient as well as delicious.
FAQs about Brownie Refrigerator Cake
Can I use homemade brownies? Yes, and it will elevate flavor, though boxed mixes are quicker.
Can I substitute whipped topping with real cream? Yes, but stabilize it with gelatin or cornstarch for longer storage.
Why is my pudding runny? Likely undermixed or made with too little milk. Always whisk thoroughly.
How long should it chill? At least two hours, though overnight chilling produces best texture.
Can I make it gluten-free? Yes, by using gluten-free brownie mix and puddings.
Conclusion
The Brownie Refrigerator Cake is a celebration of layers—fudgy, creamy, silky, and airy. It requires no intricate decoration yet looks stunning when sliced, showcasing contrast between chocolate and cream. Adaptable to countless variations, it’s as versatile as it is indulgent. Whether you’re craving peanut butter richness, strawberry freshness, or classic chocolate comfort, this cake delivers. By following the steps above, you can create a dessert that’s easy to prepare, impressive to serve, and unforgettable to taste.

